
Let’s step into the world of efficient resource management with Karpenter’s just-in-time nodes. Discover what Karpenter is, how it simplifies node provisioning in Kubernetes, and the process of implementing its capabilities within your Kubernetes infrastructure.
Introduction
Efficient resource management in Kubernetes environments brings forth a variety of challenges, especially as applications scale and infrastructure costs escalate accordingly. The phenomenon of cloud bill shock looms large, often catching organizations off-guard with unexpected spikes in cloud service charges due to unchecked resource consumption or inefficient allocation. To navigate through this landscape of financial operations, new frameworks and best practices emerge, such as the operational FinOps framework, emphasizing collaborative cloud financial management to ensure cost-effectiveness and optimization.
In this context, tools like Karpenter are essential solutions. Karpenter is an open-source tool specifically engineered for just-in-time node provisioning in Kubernetes environments. It addresses the need for dynamic resource allocation, offering a solution to scale nodes precisely when required, thereby optimizing resource utilization and mitigating unnecessary costs. Karpenter not only tackles immediate cost management challenges but also aligns with broader organizational objectives of scalability, cost efficiency, and operational excellence within Kubernetes infrastructures.
![]()
Karpenter streamlines node provisioning with its intelligent just-in-time approach, ensuring that resources are allocated when and where they’re needed most. By dynamically adjusting node capacity based on workload demands, Karpenter helps organizations to maintain optimal performance levels while minimizing excess resource consumption and associated costs.
Furthermore, Karpenter’s integration capabilities extend to both single-cluster deployments and complex multi-cluster environments, offering scalability without sacrificing efficiency. Its integration into existing workflows ensures that teams can make informed, cost-conscious decisions without disrupting productivity. With Karpenter, organizations can optimize their Kubernetes infrastructure, enhance operational efficiency, and gain comprehensive visibility into resource utilization, ultimately driving cost savings and maximizing ROI.
Getting started with Karpenter on Azure Kubernetes Service (AKS)
Let’s see Karpenter in action by implementing it into a demo AKS environment. We’ll do so by installing Managed Karpenter (AKA Node Auto Provisioning). The Node Auto Provisioning (Preview), runs Karpenter as a managed addon similar to Managed Cluster Autoscaler.
Be aware that there are specific limitations to consider. The only network configuration allowed is Cilium + Overlay + Azure. Additionally, enabling this feature is not possible in clusters where node pools have the cluster autoscaler enabled.
Furthermore, certain features are currently not supported, like Windows node pools, applying custom configuration to the node kubelet, IPv6 clusters, and Service Principals. However, you have the flexibility to use either a system-assigned or user-assigned managed identity. Also, disk encryption sets, CustomCATrustCertificates, Start Stop mode, and HTTP proxy aren’t supported as well. Lastly, while all OutboundTypes are supported, you cannot change them after creation due to a mutation constraint.
Prerequisites
Before diving into the next steps, ensure you have the following prerequisites in place:
- Azure Subscription with Owner Permissions: You’ll need an active Azure subscription with Owner permissions to create and manage resources in Azure Kubernetes Service (AKS).
- Azure CLI: Install Azure CLI for interacting with Azure services from the command line. You can install Azure CLI by following the instructions at Microsoft’s official documentation.
- Kubectl and Kubectl Login: Ensure kubectl is installed no your system, along with kubelogin to log in to Azure Kubernetes Service (AKS) using Entra ID credentials. You can install kubectl and kubelogin by following the instructions in this documentation.
- Visual Studio Code (optional): Have Visual Studio Code installed on your system for editing files and managing your project. You can download Visual Studio Code from here.
Extension installation and feature registration
To enable Node Autoprovisioning (NAP), we first need to install the aks-preview Azure CLI extension, and register the NodeAutoProvisioningPreview feature flag.
Step 1: First, login using az login, and set the right subscription with the following command:
az account set --subscription "<subscription-id>"
Step 2: Start by installing the aks-preview CLI extension. Use the command below to utilize the az extension add command to carry out the installation process:
az extension add --name aks-preview
Make sure you have the most up-to-date version of the extension by executing the az extension update command:
az extension update --name aks-preview
Step 3: Next, use the command below to register the NodeAutoProvisioningPreview feature flag using the az feature register command:
az feature register --namespace "Microsoft.ContainerService" --name "NodeAutoProvisioningPreview"
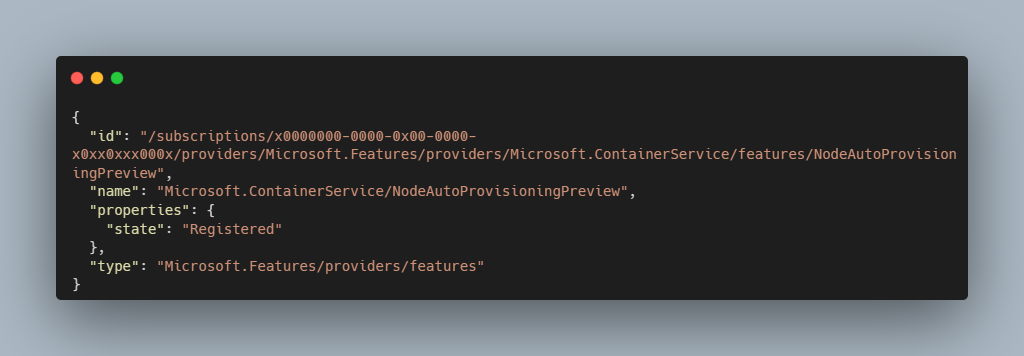
This may take up to a few minutes for the registration status to transition to “Registered”. Verify this status using the az feature show command:
az feature show --namespace "Microsoft.ContainerService" --name "NodeAutoProvisioningPreview"
Step 4: Once the status indicates “Registered”, refresh the registration of the Microsoft.ContainerService resource provider with the az provider register command:
az provider register --namespace Microsoft.ContainerService
Enable Node Autoprovisioning
To enable node autoprovisioning, you have to create a new cluster using the az aks create command and set --node-provisioning-mode to “Auto”. You’ll also need to use overlay networking and the cilium network policy.
Step 5: First, let’s create the resource group. Use the command below to create your resource group:
az group create --name rg-p-weu-karpenter-001 --location westeurope
Step 6: Next, we’ll create the AKS cluster with the --node-provisioning-mode set to “Auto”, by running the command below:
az aks create \
  --name aks-p-weu-karpenter-001 \
  --resource-group rg-p-weu-karpenter-001 \
  --node-provisioning-mode Auto \
  --network-plugin azure \
  --network-plugin-mode overlay \
  --network-dataplane cilium
⚠️ Note: This setup is for demonstration purposes and does not adhere to best practices for production scenarios.
The process of creating a cluster may require a few minutes. Once completed, you can witness your brand-new AKS cluster with Node Autoprovisioning being enabled. No more manual node pool adjustments – you are now empowered with efficient, automated scaling that simplifies the management of AKS clusters.
Node Autoprovisioning in practice
Let’s put Managed Karpenter (AKA Node Autoprovisioning) to the test. For this, we’ll use Microsoft’s all time favorite demo app: the Azure voting app.
Step 7: Download the azure-vote-all-in-one-redis.yaml file from the Azure-Samples repository on GitHub.
Step 8: Next, we need to get the credentials for the AKS cluster and login (interactively) using the command below:
az aks get-credentials -g rg-p-weu-karpenter-001 -n aks-p-weu-karpenter-001
Step 9: Use the command below to apply the configuration, defined in the YAML file we’ve just downloaded, to our Kubernetes cluster.
kubectl apply -f azure-vote-all-in-one-redis.yaml
After a few minutes you’ll find that a new node has been spun up for the Azure Vote App workload to run on. This new node is managed by Karpenter.

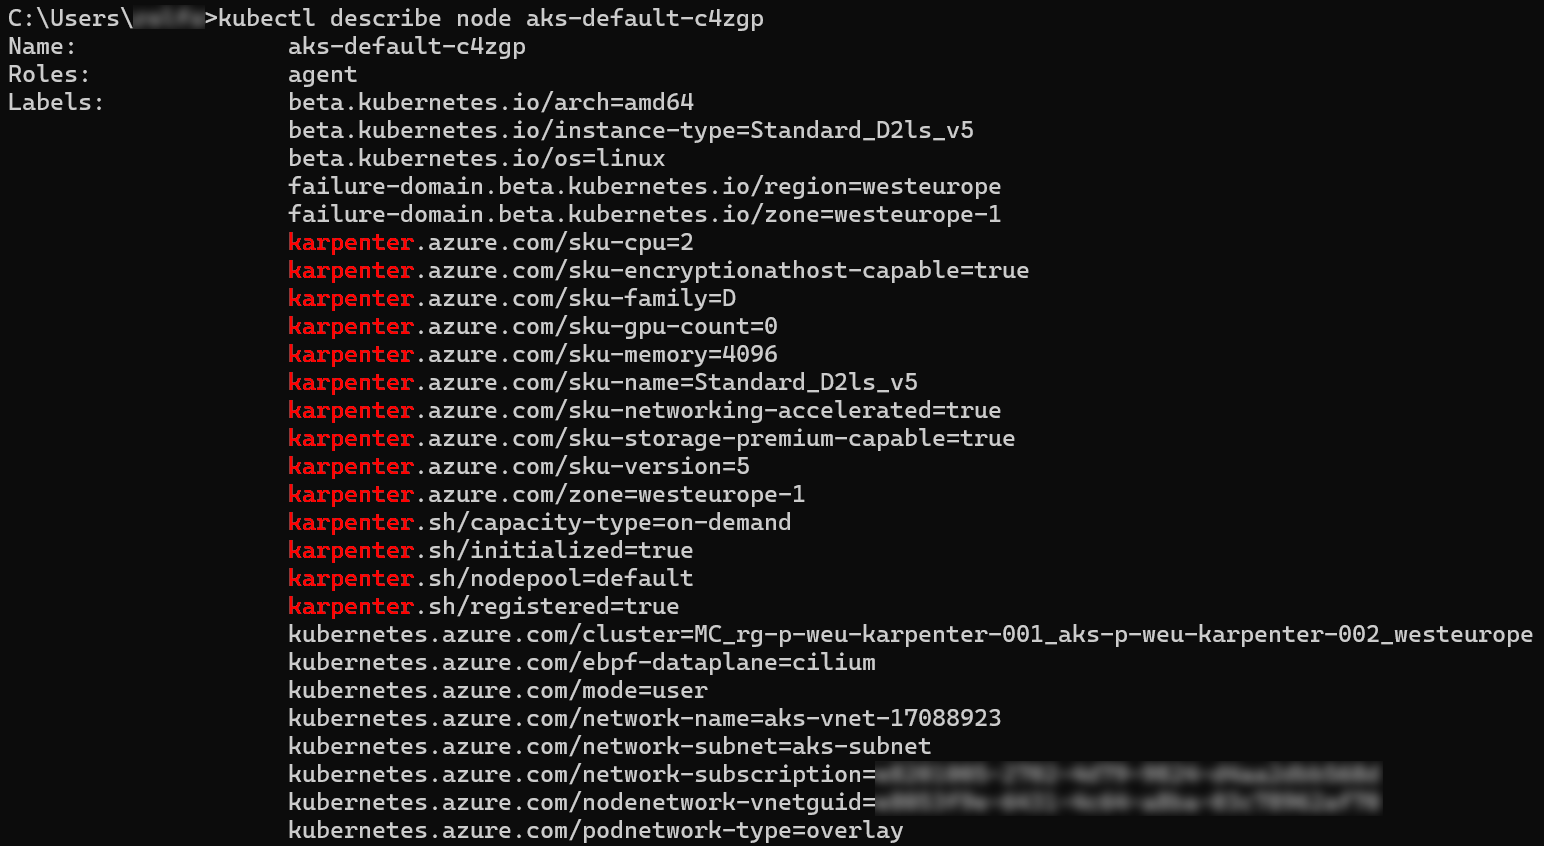
If you run the kubectl get events -A --field-selector source=karpenter -w command, you’ll retrieve Kubernetes events across all namespaces (-A) and continuously watch (-w) for events where the source is specified as “karpenter” (--field-selector source=karpenter).

These events provide insights into the context of Karpenter. They indicate nominations on specific nodes and mention whether they are nominated for node consolidation, suggesting that replacement with cheaper nodes is feasible.
Closing Words
Azure’s implementation of Node Autoprovisioning, powered by Karpenter, truly helps you advance in AKS management. By adapting node provisioning to match workload demands, this feature ensures efficiency and automation within Kubernetes environments. This not only streamlines operations but also contributes to significant cost savings and resource utilization. With Node Autoprovisioning, AKS users can achieve agility, scalability, and cost-effectiveness, ensuring optimized Kubernetes deployments and streamlined infrastructure management.
To learn more about the material we’ve covered in this blog article, you can start with reading some of the resources below:
- Karpenter
- Provider for running Karpenter on Azure Kubernetes Service (AKS) | Azure updates | Microsoft Azure
- Azure/karpenter-provider-azure: AKS Karpenter Provider
- Node autoprovisioning (preview) - Azure Kubernetes Service | Microsoft Learn
Thank you for taking the time to go through this post and making it to the end. Stay tuned, because we’ll keep continuing providing more content on topics like this in the future.