In this blog, we will learn about self-service infrastructure and Gaia, a web-based UI for managing Terraform infrastructure. This blog also covers the implementation of Gaia with Terraform on an Azure Kubernetes cluster.
Introduction
As companies increasingly move their operations to the cloud, the need for development teams to have more control over cloud resources and infrastructure has become more apparent. However, security and compliance remain significant challenges for IT professionals. In this fast-paced market where every minute counts, companies are looking for new capabilities that can help them streamline their development processes while maintaining security and compliance.
To meet these demands, many companies are turning to Cloud Centers of Excellence, which provide a centralised team to manage cloud resources and infrastructure. However, even with these centers in place, development teams still need the ability to manage their own cloud resources and infrastructure without compromising security and compliance.
This is where tools like Terraform and Gaia come in. Together, Terraform and Gaia provide development teams with the ability to manage their own cloud resources and infrastructure in a secure and compliant manner. In this blog, we will explore these tools and how they can help development teams overcome the challenges of managing cloud resources and infrastructure in today’s market.
Terraform
Terraform is an Infrastructure as Code (IaC) tool that allows you to define, provision, and manage infrastructure resources in a declarative way. Terraform provides a simple yet powerful syntax for defining infrastructure resources as code, which can be versioned, shared, and reused.
One of the main reasons to pick Terraform over other IaC tools is its use of a state file. The state file is a record of the current state of your infrastructure resources. This file is managed by Terraform and contains all the information about the resources that Terraform has provisioned. When you run terraform apply, Terraform uses the state file to determine what changes need to be made to your infrastructure resources to match the desired state that you have defined in your Terraform code.
The state file is a critical component of Terraform’s functionality. It provides a way for Terraform to track the state of your infrastructure resources over time, which allows it to make intelligent decisions about what changes need to be made when you modify your infrastructure code. Without a state file, Terraform would not be able to track the current state of your infrastructure and would have to resort to more primitive methods of determining what changes need to be made.
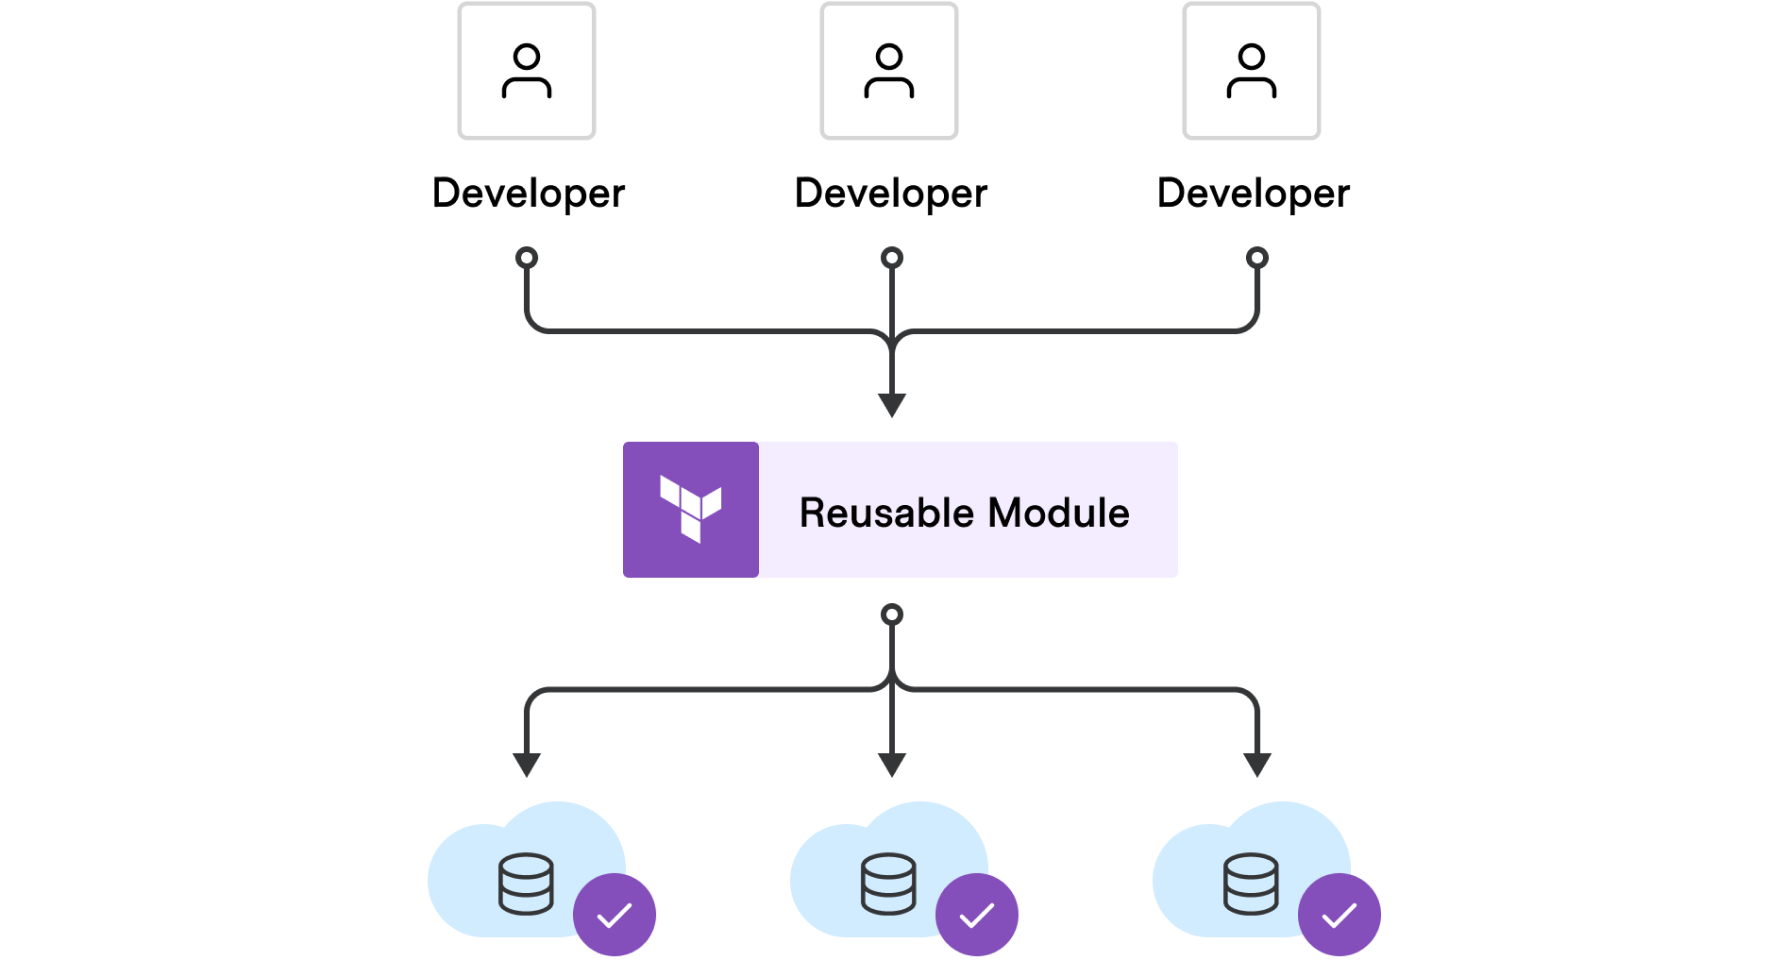
Terraform’s use of a state file is one of its key strengths, as it allows for intelligent tracking and management of infrastructure resources. Additionally, Terraform’s support for multiple cloud providers and infrastructure technologies, its active community, and its support for reusability and modularity make it a powerful and flexible tool for managing infrastructure resources as code.
Gaia
Gaia is a web-based UI for managing Terraform infrastructure. It is designed to help development teams streamline the process of building and managing their infrastructure using Terraform, while also providing self-service capabilities and democratisation of infrastructure management.
Gaia offers several key features and capabilities:
- Gaia provides a user-friendly interface that makes it easy to manage your Terraform infrastructure. The interface is intuitive, and it includes visualisations that make it easy to understand your infrastructure and how it fits together.
- With Gaia, development teams can easily create and manage their own infrastructure. This eliminates the need for infrastructure teams to manage all infrastructure requests, and allows developers to take more ownership of their infrastructure.
- Gaia allows multiple users to work on the same infrastructure, making it easy for development teams to collaborate on infrastructure projects.
- Gaia integrates with version control systems like Git, allowing you to manage your infrastructure as code and track changes over time.
- Gaia provides security and compliance features, such as RBAC (Role-Based Access Control), audit logs, and compliance reports, which help ensure that your infrastructure is secure and meets compliance requirements.
Gaia can help bring self-service capabilities and democratisation to development teams by providing a user-friendly interface for managing Terraform infrastructure, allowing developers to take more ownership of their infrastructure, and providing the necessary security and compliance features to ensure that your infrastructure is secure and meets compliance requirements.
Implementing Gaia with Terraform
In the upcoming steps, we will implement Gaia on an Azure Kubernetes cluster. To ensure consistency and scalability, we will use code to deploy and manage these resources using Terraform, using the AzureRM, Kubernetes and Helm Terraform providers.
Prerequisites
Let’s get started with implementing Gaia using Terraform. Building CI/CD pipelines will not be covered in this blog article. Before you can start deploying, there are some prerequisites to fulfill:
- Azure tenant and user account: You’ll need an Azure tenant, an Azure Active Directory (Azure AD) instance. This instance is the foundation of the environment. And it allows you to create an identity (user account) to connect to Azure, set up the environment, and deploy the resources.
- Subscription: You’ll need a subscription and owner permissions to deploy the resources.
- Terraform: You’ll need the Terraform command-line interface to deploy and manage Azure resources. You can find more information about Terraform and the used providers on the HashiCorp documentation website.
- Azure CLI: You’ll need the Azure command-line interface for deploying the resources, and you can find more information about the Azure CLI in the documentation.
- Kubectl: You’ll need the Kubernetes command-line tool for deploying images and running other commands against your Kubernetes cluster. You can find more information about kubectl in the documentation.
Once you have fulfilled the prerequisites, we are ready to move forward and implement our Azure Kubernetes cluster and deploy Gaia! We’ll cover the implementation through the example code that can be downloaded from this GitHub Repository.
Deploy the Kubernetes cluster and Gaia web application
We’ll start off with deploying an Azure Kubernetes cluster through the AzureRM Terraform provider, create a specific namespace for Gaia using the Kubernetes Terraform provider, and install Gaia using the Helm Terraform provider.
- Navigate to the GitHub repository mentioned above, that contains the Terraform files for this deployment.
- Click the green “Code” button and select “Download ZIP” to download the repository as a ZIP file.
- Extract the ZIP file to a directory on your local machine.
- Open a terminal or command prompt and navigate to the directory where you extracted the ZIP file.
- Open the
variables.tffile in a text editor or IDE of your choice. - Review the variable definitions to ensure they match your desired configuration. Variables define the values that Terraform will use to create and manage resources.
- Adjust the values of the variables to your liking. For example, if you want to create an AKS cluster in a specific resource location, you can change the value of the
**location**variable to the desired value. - Save the
variables.tffile after making any changes. - Run the command
terraform initto initialize Terraform in the directory. This will download any necessary plugins and modules. - Run the command
terraform planto see a preview of the changes that Terraform will make to your infrastructure. - If you are satisfied with the plan, run the command
terraform applyto apply the changes and deploy the resources defined in the Terraform files.
This Terraform code will create a resource group, an AKS cluster with a managed identity, connect it to an Azure Container Registry, create a Kubernetes namespace, and deploy the Gaia Helm chart to that namespace.
Retrieve the external IP
There are multiple ways to retrieve the external IP of your Gaia web application that you deployed on a Azure Kubernetes cluster. In our case, we’ll be retrieving it through Azure CLI.
- Open a terminal or command prompt on your local machine.
- Login to your Azure account by running the command
az loginand following the prompts. - Switch to the Kubernetes context of your Azure Kubernetes cluster by running the command
az aks get-credentials --resource-group <resource-group-name> --name <cluster-name>, where<resource-group-name>is the name of the resource group where your cluster is deployed, and<cluster-name>is the name of your Kubernetes cluster. - Once you have switched to the Kubernetes context of your cluster, run the command
kubectl get servicesto list all the services in your cluster. - Locate the name of the service associated with your web application and note it down.
- Run the command
kubectl get service <service-name>(replace<service-name>with the actual name of your service) to retrieve the details of the service. - Look for the
EXTERNAL-IPfield in the output. If the value is<pending>, it means that the external IP address has not yet been assigned. Wait for a few minutes and run the command again. - Once you have retrieved the external IP address, you can access your Gaia web application by entering the IP address in your web browser.
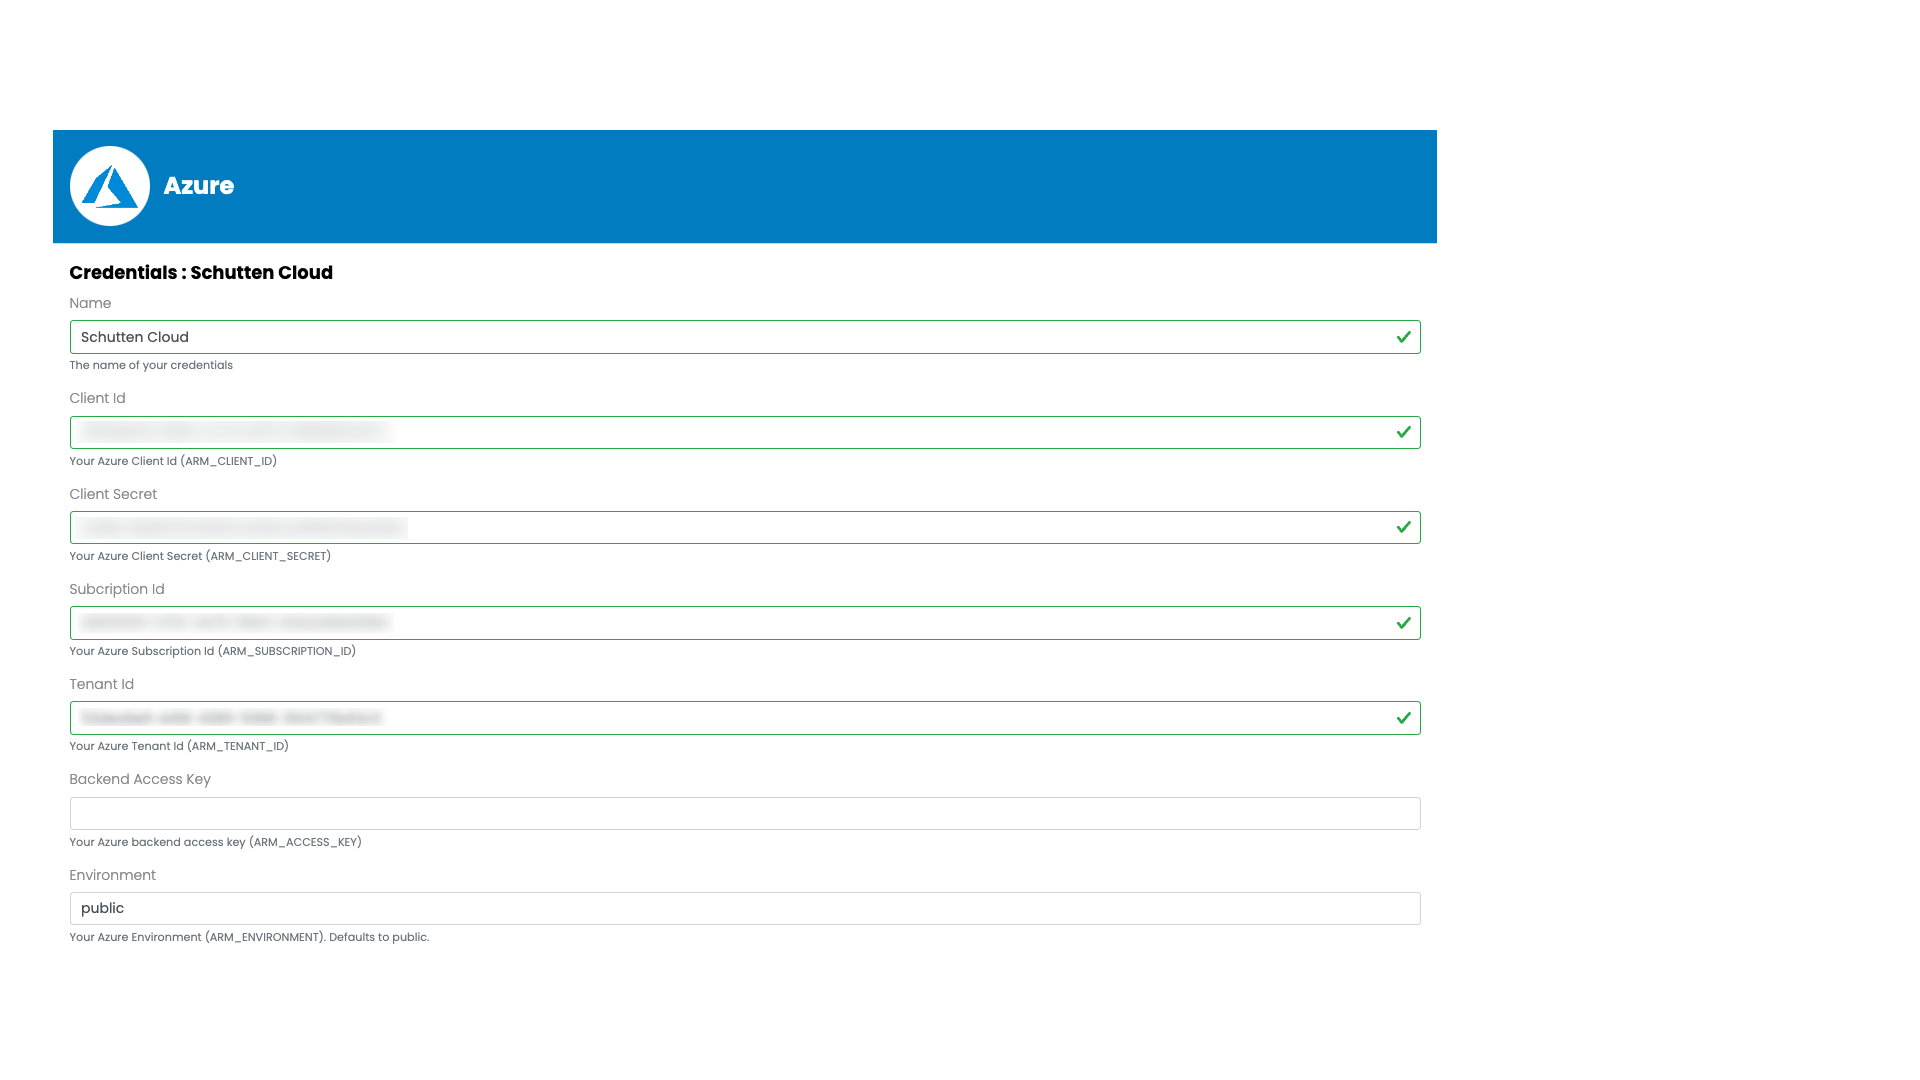
Set up the credentials
To enable the Gaia web application to securely create, manage, deploy and destroy infrastructure resources, we’ll need a service principal with proper permissions. In the following steps we’ll create an App registration and add it to Gaia.
- Go to the Azure portal and navigate to the Azure Active Directory section.
- Click on “App registrations” and then “New registration”.
- Fill in the required information, such as the name and redirect URI, and click on “Register”.
- Once the App Registration is created, navigate to the “Certificates & secrets” tab and click on “New client secret”.
- Fill in the required information, such as the description, and click on “Add”.
- Copy the generated secret and save it securely.
- Navigate to the “API permissions” tab and click on “Add a permission”.
- Select “Microsoft Graph” and then “Delegated permissions”.
- Search for “Contributor” and select it.
- Click on “Add permissions”.
- Navigate to the “Overview” tab and copy the “Application (client) ID” and “Directory (tenant) ID”.
- Now, navigate to the Azure subscription where you want to give Contributor rights and click on “Access control (IAM)”.
- Click on “Add role assignment” and select “Contributor” as the role.
- Search for the App Registration you just created by its name or client ID, select it, and click on “Save”.
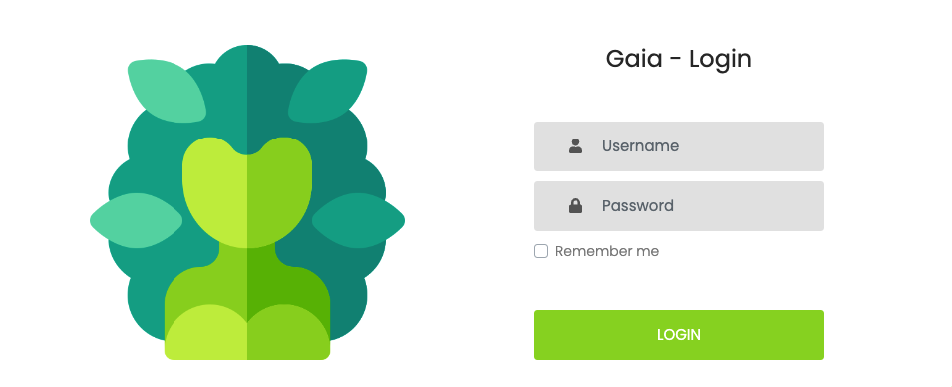
- Go to the retrieved external IP and log in as admin. By default the username is “admin” and the password is “admin123”.
- Navigate to the “Credentials” tab on the sidebar and click on “Create new credentials”.
- Choose the Terraform provider. In our case we’re choosing for “Azure”.
- Fill in the mandatory credential fields with the values from the previous steps, and click on “Save”.
Import a module
It’s now time to import our first module, allowing it to be consumed by users for self-service infrastructure. In Gaia, a module is a collection of Terraform resources that can be reused across multiple infrastructure configurations. It encapsulates a set of resources, input variables, and outputs, making it easier to manage and maintain the code. Modules can be published in public or private module registries, and they can be versioned, making it possible to track changes and ensure reproducibility. For testing purposes I use a very simple resource-group module.
- Go to the retrieved external IP and log in as admin. By default the username is “admin” and the password is “admin123”.
- Navigate to the “Modules” tab on the sidebar and click on “Import Module”.
- Click on “manually”.
- Enter a module name. In my case I named it “resource-group”.
- Fill in the “Main provider”. In our case we’ll choose “Azure”.
- Fill the “Git Repository URL” field with the URL of the module’s git repository. The URL for my resource-group module is
https://github.com/rolfschutten/terraform-modules. - If the module’s code inside the repository is in a sub-directory, then you’ll also have to fill the “Git repository directory” field. In my case the value is
resource-group. - We’ll also have to define the variables at the bottom of the screen. My resource-group module has two:
resource_group_nameas a “Name” value. As it doesn’t have a default value, it is both “Editable” and “Mandatory”. So, those switches are turned ON.resource_group_locationas a “Name” value, and"westeurope"as a “Default value”. As it has a default value, only the “Editable” switch is turned ON.
- Other non-mentioned fields are optional. Fill them to your liking.
- Click on “Save” on the bottom of the page.
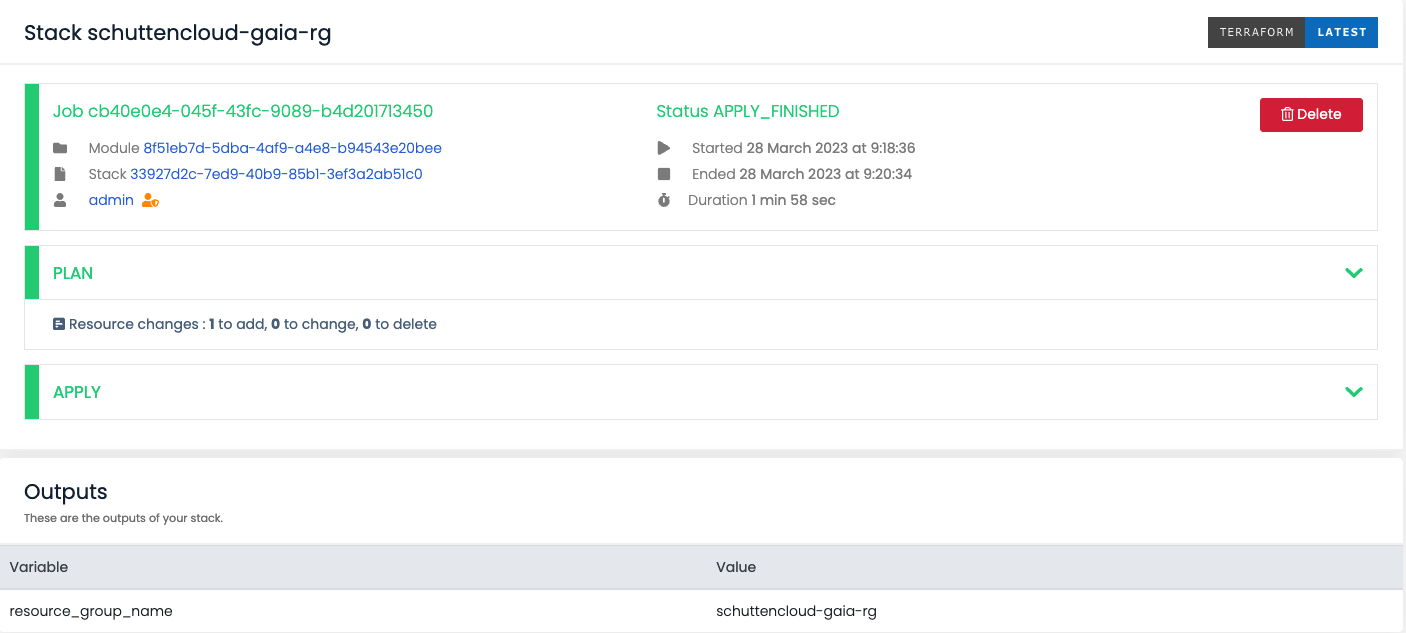
Create and run your stack
A stack in Gaia is an instance of a module with a specific configuration for a specific environment. It represents the infrastructure that is currently deployed and managed by Gaia. A stack includes the resources defined in the module, as well as any additional resources that may be required for the specific environment, such as networking or security resources. Stacks can be deployed, updated, and destroyed independently, making it possible to manage different environments and configurations with the same codebase. In the next step we’ll create a stack out of the resource-group module.
- Go to the retrieved external IP and log in as admin. By default the username is “admin” and the password is “admin123”.
- Navigate to the “Modules” tab on the sidebar and click on “Run” (rocket icon) on the Module we’ve created in the previous steps.
- Fill in the “Name”, and optionally the “Description”, field of your stack. Click on “Next”.
- Fill in the two input variables. In my case, I left the
resource_group_locationto its default, and used “schuttencloud-gaia-rg” for myresource_group_name. Click on “Next”. - Select the credentials for your stack from the dropdown list. This represents the App Registration we’ve created earlier. Click on “Next”.
- Click on “Save and Run”.
- Navigate to the “Stacks” tab on the sidebar and click on “Edit” (icon) on the Stack we’ve created in the previous steps.
- Click on “Run” (rocket icon) on the top of the page.
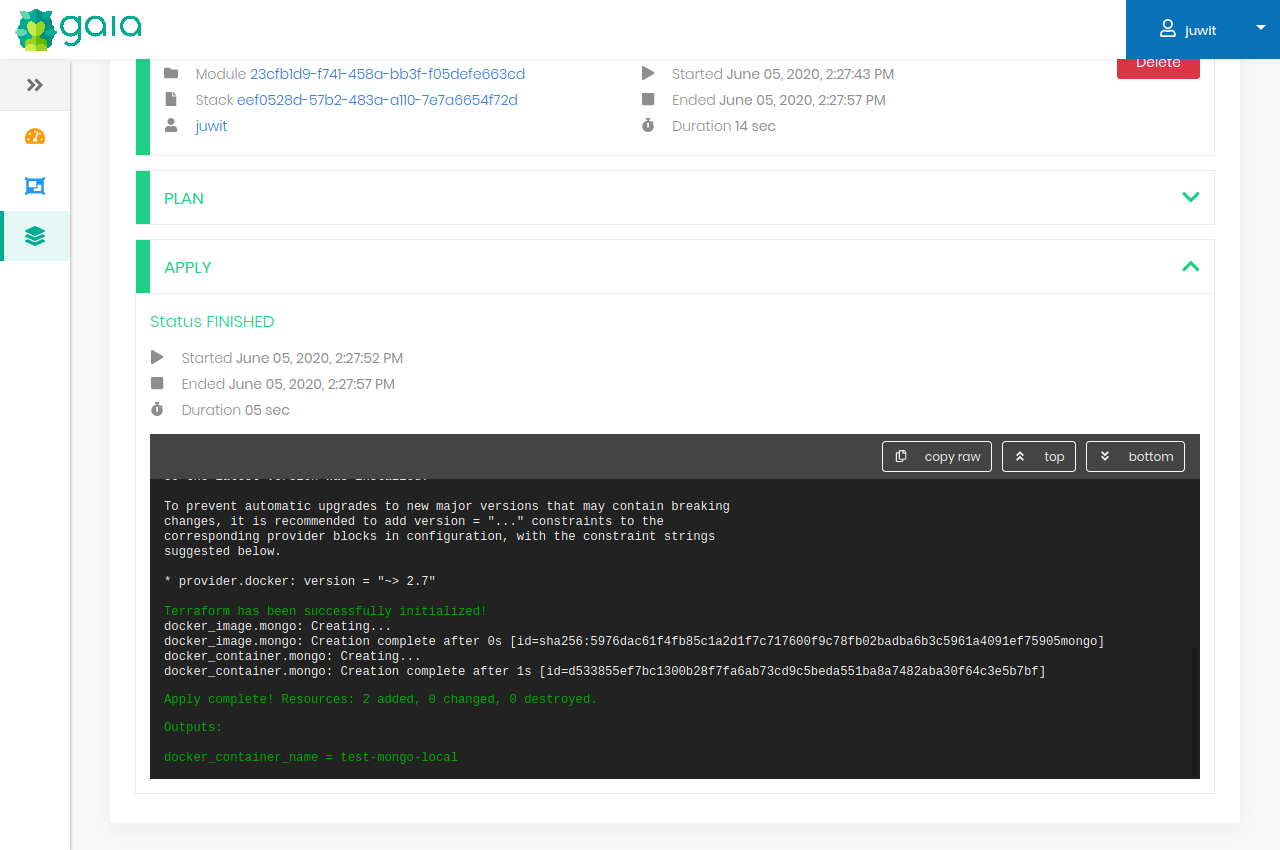
- Gaia now starts to run
terraform plan. It provides output information on the screen. Once completed, click on “Apply”. - Gaia now starts to run
terraform apply. Once completed, your resource group has been created. - Go to the Azure portal and review the creation of the resource group.
Destroy and clean up
We will remove all resources created during this guide to save costs and keep an overview of your environment.
- Navigate to the “Stacks” tab on the sidebar and click on “Edit” (icon) on the Stack we’ve created in the previous steps.
- Click on “Destroy” on the top of the page. Click “Yes” on the confirmation pop-up.
- Gaia now starts to run
terraform plan. It provides output information on the screen. Once completed, click on “Destroy”. - Gaia now starts to run
terraform destroy. Once completed, your resource group has been deleted. - Go to the Azure portal and review the deletion of the resource group.
- Open a terminal or command prompt and navigate to the directory where you extracted the earlier downloaded ZIP file, containing the Terraform files.
- Run the command
terraform destroyto destroy the resources created earlier by the Terraform configuration.
Closing words
While we’ve covered a relatively simple example of a resource group module, it’s clear that Gaia can be a game changer when it comes to self-service infrastructure. By coding infrastructure with Terraform and modeling it in reusable modules, a user-friendly and verifiable self-service portal can be offered to developers together with Gaia.
To learn more about the topics that were covered in this blog article, refer to the links below:
Thank you for taking the time to go through this post and making it to the end. Stay tuned because we’ll keep continuing providing more content on topics like these in the future.